Getting started
The Gloop window
The column of workspaces, the bar at the top, the four tabs, the command palette and the guided tour: where everything is, on one page.
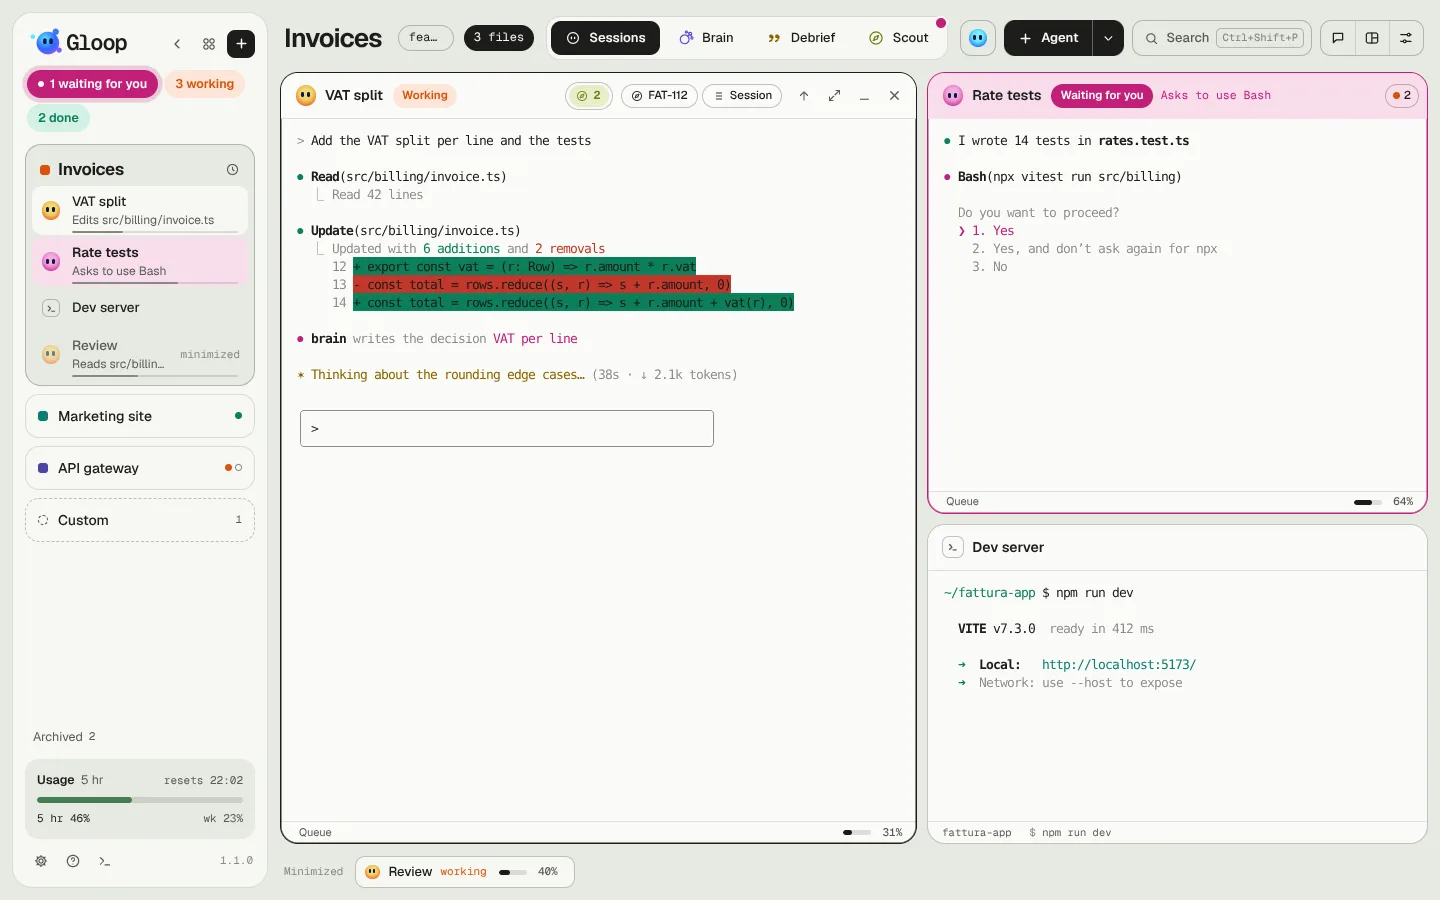
The Gloop window has three parts: on the left the column with your workspaces, at the top the bar of the open workspace, in the middle its panes.
The column
From top to bottom:
- The logo and three buttons: collapse the column into a strip, open Control (every agent of every workspace) and create a new workspace.
- The pills: how many agents are waiting for you, how many are working, how many are done. They are buttons: each click takes you to the next agent in that state, in turn.
- The workspaces. The open one is a card with its panes: for each, the mascot in the colour of its state and a line on what it's doing. The others are a single row, with a dot per pane. Drag them to change the order.
- Custom, always last: the space for agents from different folders. See The Custom space.
- Archived: workspaces taken out of the column without losing anything.
- Usage: how much of your plan you've used in the last 5 hours and in the week. See Usage, limits and costs.
- At the bottom: the gear for Settings, Help (these docs, what's new, the guided tour and the short guides), the shortcuts and the app's version (with a dot when there's news to read).
The column doesn't repeat the state in words: the colours say it. Words stay for what colour can't say, like minimized or how long an agent has been working.
The strip
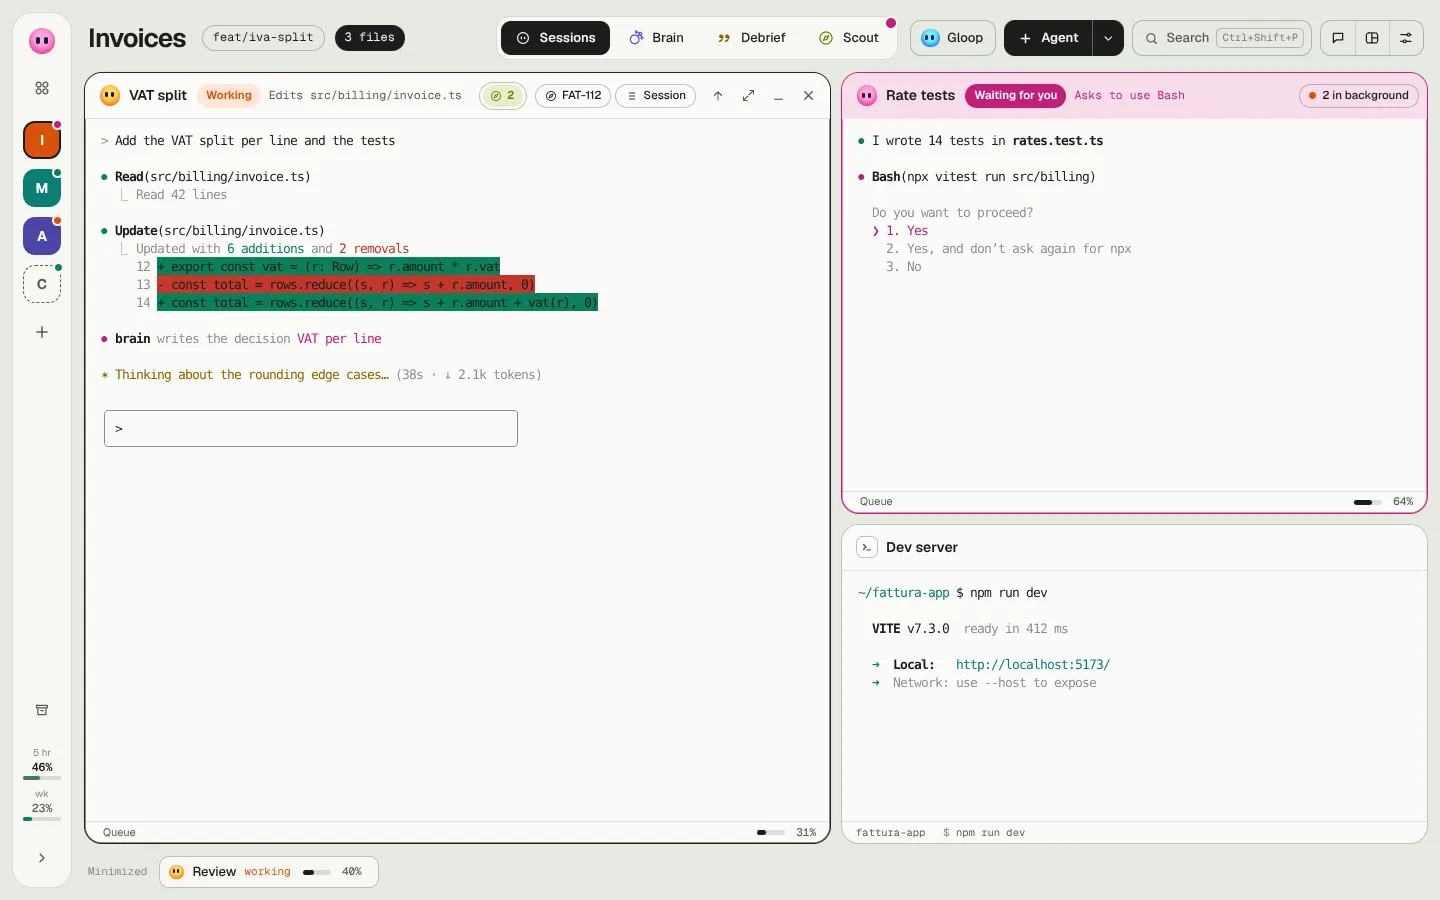
With ‹ at the top the column becomes a thin strip: a coloured initial per workspace, with the dots of whoever is waiting for you, and the plan's usage at the bottom. More room for the panes, the same essential information. Gloop remembers your choice.
The workspace bar
On the left the workspace's name (a click opens its settings), the folder's git branch and the number of changed files: a click opens Changes.
In the middle the four tabs, always in the same place:
| Tab | What you find there |
|---|---|
| Sessions | The panes: agents and shells at work. The dots under the tab show the states. |
| Brain | The project's notes. See The Brain. |
| Debrief | The story of the work done on the branch. See The Debrief. |
| Scout | Client requests, from analysis to delivery. See Scout. |
On the right:
- Gloop, the chat that proposes plans and opens agents for you. See The coordinator.
- Agent, with the arrow next to it for the other ways of opening one: with a task, on its own branch, in another folder, try in parallel, recipes.
- Search opens the command palette.
- The workspace's group: the saved prompts, the layout of the panes and the workspace settings.
When the window is narrow the bar never wraps onto two lines: the less important parts shrink step by step (the tabs keep only their icon, the name stays in the tooltip). Prompts and layout remain in the palette.
The command palette
Ctrl+Shift+P (or Ctrl+K) opens the palette: type something and you find agents of every workspace, workspaces, actions (new agent, new shell, try in parallel, recipes, Do not disturb, What waits for you…) and the saved prompts. Arrows to choose, Enter to do.
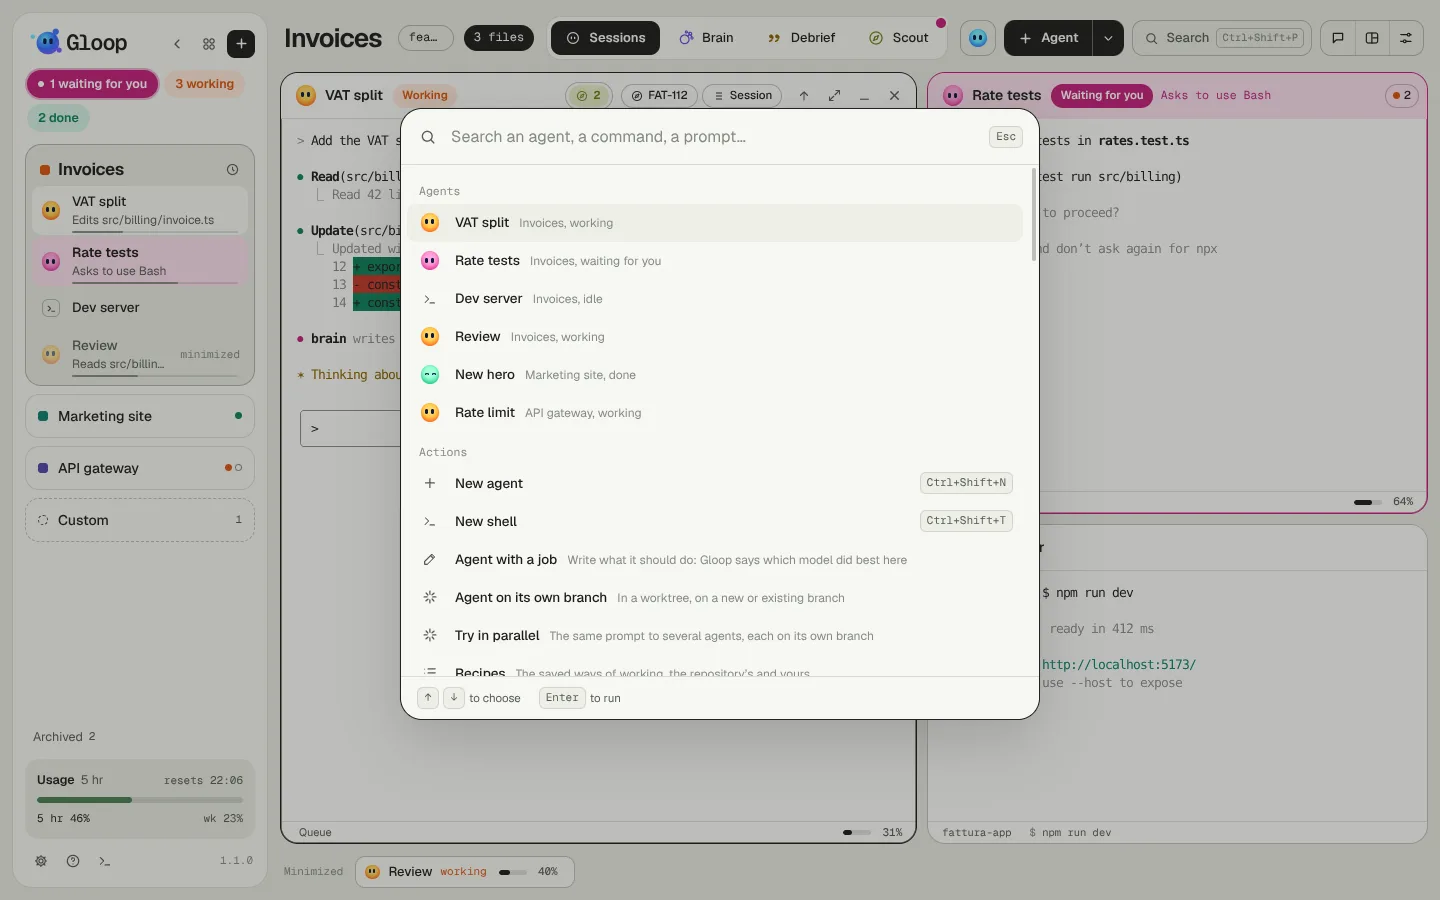
It's the fastest way to get anywhere without the mouse. Almost everything that's in the menus is here too.
Help and the guided tour
At the first start the overview runs: on an example workspace built in front of you, the buttons press themselves and you watch a workspace, an agent, its colours, the Brain and the Debrief come to life. You can skip it at any time with Skip the tour.
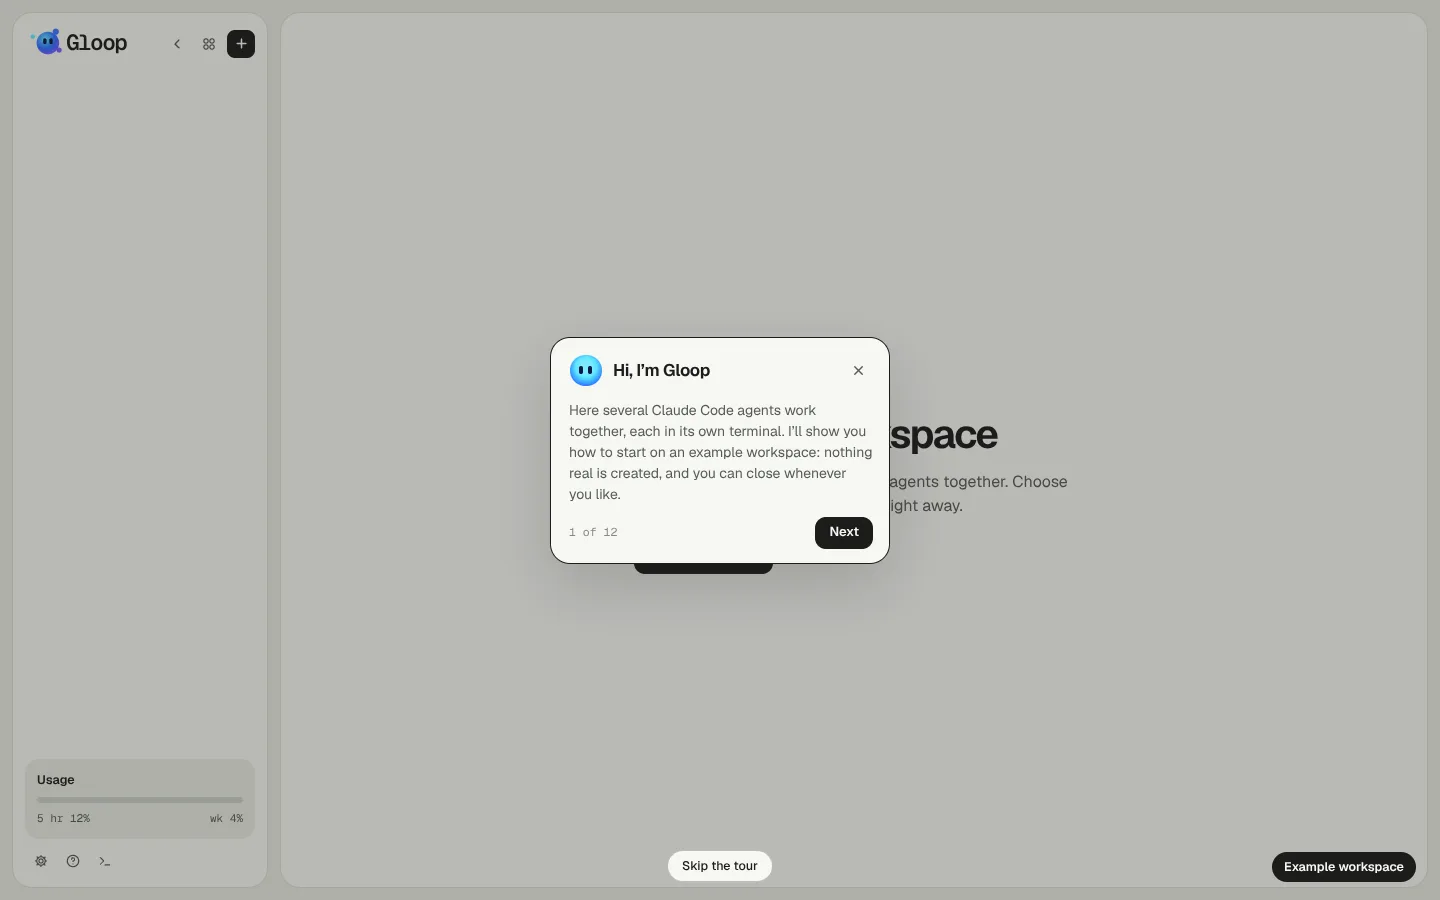
Then, while you work, the short guides come up: once only, the first time something happens (an agent waiting for you, two panes side by side, changed files…). They never sit on top of an open window. Help, at the bottom of the column, shows them all again; Skip the guides turns them off.
At the top of Help there's Documentation, which opens these pages in your browser, in the app's language; you'll find it in the palette too.
Notifications
When the Gloop window isn't in front, an agent that's waiting for you or is done sends you a system notification; one click and you're on its pane. On top of that:
- the app icon on the taskbar (or in the Dock) takes the mascot's colour, and a badge says how many agents are waiting for you;
- the notch at the top of the screen keeps an eye on the agents even with Gloop behind other windows. See The notch and the widget;
- different sounds for "waiting for you" and "done", which you choose in Settings → Agents.
If you want some quiet for a while, there's Do not disturb.